I like to use my laptop in the garden but used to find it difficult to see where the mouse pointer was. I changed it to a big pinky-purple one and now have no difficulty seeing it:
Click Windows + I to go to the Settings page
Then Devices > Mouse > Adjust Mouse and Cursor Size
The macro below will look through a Word document and copy all the images to a new folder elsewhere. Thanks to T. Patrick Bailey for this one.
Sub SaveAllImages()
'
' SaveAllImages Macro
' Author T. Patrick Bailey
'
    'Full File name, used to reopen the original file
    FileName = ActiveDocument.FullName

    'This is the name I am going to prepend on my image files
    '(mine is based on the original documents name
    prePendFileName = Left(ActiveDocument.Name, Len(ActiveDocument.Name) - 5)
    prePendFileName = Right(prePendFileName, Len(prePendFileName) - 11)

    'Location where to save the file to
    saveLocation = "D:\pictures\"

    'Today's date formated
    TodayDateString = Year(Date) & "_"
    If Month(Date) < 10 Then
        TodayDateString = TodayDateString & "0"
    End If
    TodayDateString = TodayDateString & Month(Date) & "_"

    If Day(Date) < 10 Then
        TodayDateString = TodayDateString & "0"
    End If
    TodayDateString = TodayDateString & Day(Date)


    'Folder name
    FolderName = TodayDateString & "_" & prePendFileName

    MsgBox "Saving Images to " & saveLocaton & FolderName & "_files"

    'Delete the folder if it exists
    On Error Resume Next
    Kill saveLocaton & FolderName & "_files\*"  'Delete all files
    RmDir saveLocation & FolderName & "_files"  'Delete folder

    'First Save the current document as is
    ActiveDocument.Save

    'Save file as an html file
    ActiveDocument.SaveAs2 FileName:=saveLocaton & FolderName & ".html", _
       FileFormat:=wdFormatHTML

    ActiveDocument.Close
    'Delete files that are not images
    Kill saveLocaton & FolderName & ".html"
    Kill saveLocaton & FolderName & "_files\*.xml"
    Kill saveLocaton & FolderName & "_files\*.html"
    Kill saveLocaton & FolderName & "_files\*.thmx"

    'Rename image Files
    'This is written for files with 99 or fewer images
    For x = 1 To 9
        Name saveLocaton & FolderName & "_files\image00" _
        & x & ".png" As saveLocaton & FolderName & "_files\" _
        & prePendFileName & "_00" & x & ".png"
    Next

    For x = 10 To 99
        Name saveLocaton & FolderName & "_files\image0" _
        & x & ".png" As saveLocaton & FolderName _
        & "_files\" & prePendFileName & "_0" & x & ".png"
    Next

    'Reopen the file as a word document
    Word.Documents.Open (FileName)

    'Set Word to be the active (on top) program
    Word.Application.Visible = True
    Word.Application.Activate
For revision powerpoints I like to play slides in a random order. The code below will shuffle the slides then play them in the new order. Thanks to Jamie Garroch at BrightCarbon for this program.
Option Explicit
Option Base 1

'----------------------------------------------------------------------------------
' PowerPoint VBA Macro to run a slide show in a random order.
'----------------------------------------------------------------------------------
' Copyright (c) 2020 BrightCarbon Ltd. All Rights Reserved.
' Source code is provided under Creative Commons Attribution License
' This means you must give credit for our original creation in the following form:
' "Includes code created by BrightCarbon Ltd. (brightcarbon.com)"
' Commons Deed @ http://creativecommons.org/licenses/by/3.0/
' License Legal @ http://creativecommons.org/licenses/by/3.0/legalcode
'----------------------------------------------------------------------------------
' Purpose : Create and run a random slide show.
' Author : Jamie Garroch
' Date : 25MAR2020
' Website : https://brightcarbon.com/
'----------------------------------------------------------------------------------
Sub RandomOrder()
  Dim oSld As Slide
  Dim aSlides() As Variant

  On Error Resume Next

  With ActivePresentation
    ReDim aSlides(.Slides.Count)

    ' Get a list of all of the slide IDs in the presentation
    For Each oSld In .Slides
      aSlides(oSld.SlideIndex) = oSld.SlideID
    Next

    ' Reorder the list of slides in a random order
    ShuffleArrayInPlace aSlides

    ' Create and run a custom slide show using the random order
    With .SlideShowSettings
      .NamedSlideShows("Random").Delete
      .NamedSlideShows.Add "Random", aSlides
      .ShowType = ppShowTypeSpeaker
      .LoopUntilStopped = msoTrue
      .RangeType = ppShowNamedSlideShow
      .SlideShowName = "Random"
      .Run
    End With
  End With

  On Error GoTo 0

End Sub

'----------------------------------------------------------------------------------
' ShuffleArrayInPlace
' This shuffles InArray to random order, randomized in place.
' Source: http://www.cpearson.com/excel/ShuffleArray.aspx
'----------------------------------------------------------------------------------
Private Sub ShuffleArrayInPlace(InArray() As Variant)
    Dim N As Long
    Dim Temp As Variant
    Dim J As Long

    Randomize
    For N = LBound(InArray) To UBound(InArray)
        J = CLng(((UBound(InArray) - N) * Rnd) + N)
        If N <> J Then
            Temp = InArray(N)
            InArray(N) = InArray(J)
            InArray(J) = Temp
        End If
    Next N

End Sub
The code below will go to a folder, copy all the pictures and put them on slides in a powerpoint, one picture per slide.
Sub ImportABunch()

Dim strTemp As String
Dim strPath As String
Dim strFileSpec As String
Dim oSld As Slide
Dim oPic As Shape

' Edit these to suit:
strPath = "c:\My Pictures\"
strFileSpec = "*.jpg"

strTemp = Dir(strPath & strFileSpec)

Do While strTemp <> ""
    Set oSld = ActivePresentation.Slides.Add(ActivePresentation.Slides.Count + 1, ppLayoutBlank)
    Set oPic = oSld.Shapes.AddPicture(FileName:=strPath & strTemp, _
    LinkToFile:=msoFalse, _
    SaveWithDocument:=msoTrue, _
    Left:=0, _
    Top:=0, _
    Width:=-1, _
    Height:=-1)
    ' width/height of -1 tells PPT to import the image at its "natural" size

' make the picture as big as possible on the slide
' without changing the proportions
With oPic
If 3 * .width > 4 * .height Then
.width = ActivePresentation.PageSetup.Slidewidth
.Top = 0.5 * (ActivePresentation.PageSetup.Slideheight - .height)
Else
.height = ActivePresentation.PageSetup.Slideheight
.Left = 0.5 * (ActivePresentation.PageSetup.Slidewidth - .width)
End If
End With

    ' Get the next file that meets the spec and go round again
    strTemp = Dir
Loop

End Sub
For my revision documents I often create a master slide and duplicate it lots of times. The following code will duplicate Slide 1 twenty times and when I use it it’s easy to step inside and change Slide 1 to whichever slide I want to duplicate, and change the 20 to 100 if I need to.
Dim Words
For Words = 20 To 1 Step -1
Set newSlide = ActivePresentation.Slides(1).Duplicate

Next Words
My colleague Laura Den produces wonderful powerpoints but I find them a bit heavy on the animations. I run the following macro over them to remove all animations and I add back just a few.
Sub RemoveAllAnimations()

Dim sld As Slide
Dim x As Long
Dim Counter As Long

For Each sld In ActivePresentation.Slides

For x = sld.TimeLine.MainSequence.Count To 1 Step -1

sld.TimeLine.MainSequence.Item(x).Delete

Counter = Counter + 1

Next x

Next sld

End Sub
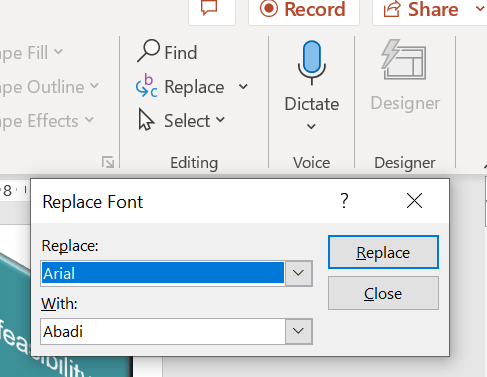
I join lots of powerpoints together to make one large one and I like all the writing to be the same font, size and colour. There is a button in Home to replace all of one font with another:
But this will not change the colour and size, and requires me to change each font individually. So I use the following macro:
Sub ArialFont()
Dim sld As Slide
Dim shp As Shape

For Each sld In ActivePresentation.Slides
    For Each shp In sld.Shapes
    If shp.HasTextFrame Then
    If shp.TextFrame.HasText Then
        With shp.TextFrame.TextRange.Font
            .Size = 24
            .Name = "Arial"
            .Bold = False
            .Color.RGB = RGB(0, 0, 0)
        End With
    End If
    End If
    Next shp
Next sld

End Sub
In the macro I can easily change the font, colour and size to apply to the whole powerpoint.
My colleague Duane Arl was very frustrated that his tables kept appearing with the writing above the middle of the line, even though he set his table to be centre justified:
‘Why is everything floating up near the top?’ he would screech. ‘Well, Duane, it’s because in Paragraph your tables have a line spacing of 1.5 – if you set the line spacing to 1 line you will have your data in the middle:
‘But my whole document is spaced at 1.5 lines – do I have to go through and change each table individually?’ ‘No, Duane,’ I replied, ‘Just run the macro below over your document – the whole thing will stay at a spacing of 1.5 but your tables will be spaced at 1 line and all your data will be in the middle.’
Dim J As Integer
    Dim iTableNum As Integer
    Dim oTbl As Table

    Selection.Bookmarks.Add ("TempBM")
    For J = 1 To ActiveDocument.Tables.Count
        Set oTbl = ActiveDocument.Tables(J)
        oTbl.Select
        If Selection.Bookmarks.Exists("TempBM") Then
            iTableNum = J
            Exit For
        End If

      With Selection.ParagraphFormat
        .LeftIndent = CentimetersToPoints(0)
        .RightIndent = CentimetersToPoints(0)
        .SpaceBefore = 0
        .SpaceBeforeAuto = False
        .SpaceAfter = 0
        .SpaceAfterAuto = False
        .LineSpacingRule = wdLineSpaceSingle
        .Alignment = wdAlignParagraphJustify
        .WidowControl = True
        .KeepWithNext = False
        .KeepTogether = False
        .PageBreakBefore = False
        .NoLineNumber = False
        .Hyphenation = True
        .FirstLineIndent = CentimetersToPoints(0)
        .OutlineLevel = wdOutlineLevelBodyText
        .CharacterUnitLeftIndent = 0
        .CharacterUnitRightIndent = 0
        .CharacterUnitFirstLineIndent = 0
        .LineUnitBefore = 0
        .LineUnitAfter = 0
        .MirrorIndents = False
        .TextboxTightWrap = wdTightNone
        .CollapsedByDefault = False
    End With

    Next J
    ActiveDocument.Bookmarks("TempBM").Select
    ActiveDocument.Bookmarks("TempBM").Delete
If one opens a Word document using File>Open one is taken to the Backstage which was introduced in an ‘upgrade’ in 2013. The Backstage looks like this:
Most of the time one clicks on ‘This PC’. To avoid going to the Backstage ever again click File>Options>Save then check the ‘Don’t show Backstage’ box:
Then put a button on the Quick Access Toolbar as detailed here:
When opening a Word document one clicks on the above button (always visible) and is taken straight away to the action area, instead of clicking three times to navigate there.
If one closes a Word document using the cross at the top right of the screen, Word closes down altogether if the document is the last Word document open. This means that next time one opens a Word document there is a lot of whirring as Word creaks and groans into action again. To avoid this, close the document using Ctrl>W – this closes the document but not Word. The next time one opens a Word document, Word is already in action and the document pings open instantly.